
티스토리 뷰
< CSS 기본문법 >
❑ class
⇨ 클래스명을 지정할 때 앞에 .을 찍고 시작
❑ id
⇨ id를 지정할 때 앞에 #을 붙임
<!DOCTYPE html>
<html lang="en">
<head>
    <meta charset="UTF-8">
    <meta http-equiv="X-UA-Compatible" content="IE=edge">
    <meta name="viewport" content="width=device-width, initial-scale=1.0">
    <title>CSS 기본문법</title>
    <style>
        p {color:green;}
    </style>
    <link rel="stylesheet" href="01_style.css">
</head>
<body>
    <h1 style="color:blue;">CSS 기본문법</h1>
    <p>cascade style sheet 스타일을 지정한다.</p>
    <h2>heading</h2>
</body>
</html>
< Colors = 색상>
❑ hex code
⇨ 두 자리씩 같을 때 한 개로 합치기
⇨ #ffffff는 #fff로 합치기
❑ rgba color (= RGB+투명도)
⇨ 0~1
⇨ 용량을 줄이기 위해 간략하게 쓸수록 좋음
ex) 0.5 = .5 = 50%
⇨ 배경과 글자색은 태그된 부분만 투명도가 적용됨
❑ hsl color (= h:색조 / s:채도 / l:밝기)
❑ opacity
⇨ 태그 안이 아닌 단독으로 opacity 속성을 주면 전체적으로 적용됨
⇨ 배경색 / 글씨색 둘 다 투명도가 적용됨
❑ class
⇨ 하나 또는 하나 이상 동일한 스타일
⇨ 클래스명을 쓸 땐 앞에 .을 찍고 시작
ex) .class{color:#fff;}
<style>
        h2{
            background-color:blue;
            color: white;
        }
        h3{
            background-color:#00f;
            color: #fff;
        }
        h4{
            background-color:rgb(0,0,255);
            color:rgb(255,255,255);
        }
        h5{
            background-color:rgba(0,0,255,.5);
            color: rgb(255, 255, 255);
        }
        h6{
            background: hsl(240, 100%, 50%);
            color:hsl(0,0%,100%);
        }
        .box{
            width:400px;
        }
        .box1{
            width:400px;
            background-color: rgb(17,58,115);
        }
        .box2{
            width:400px;
            background-color: rgba(17, 58, 115, .25);
        }
    </style>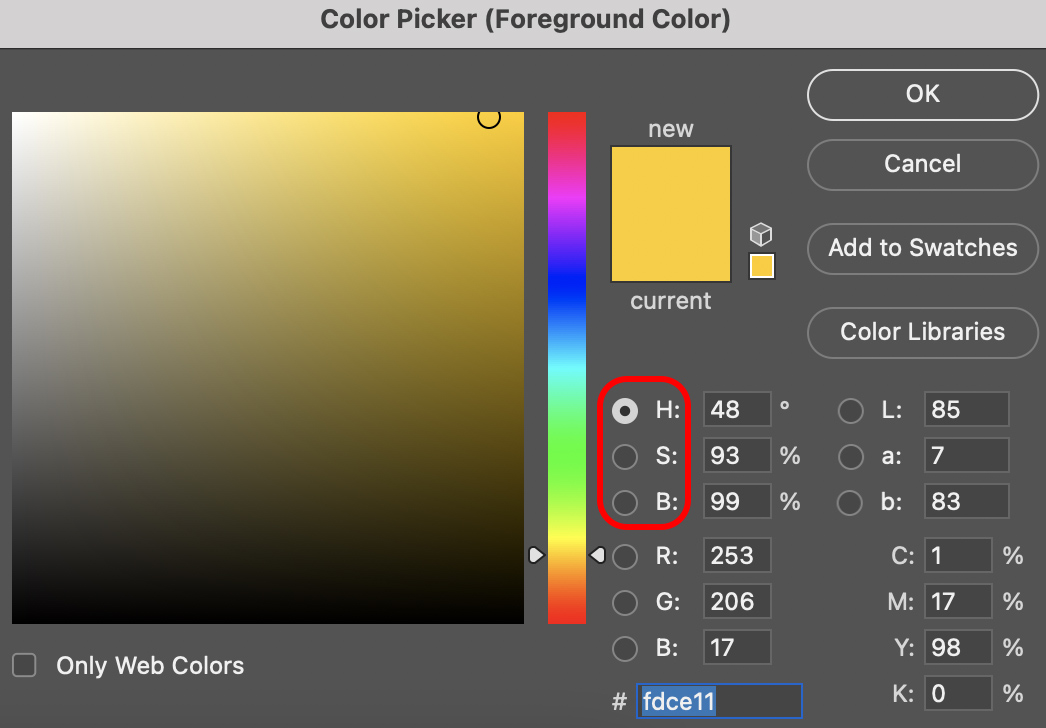
➡ 포토샵 색상표에서 HSL 확인하는 법
< unit = 단위>
❑ px (=픽셀)
⇨ font 기본값은 16px
❑ %
⇨ 부모가 만들어 준 공간에서의 비율
⇨ %는 무조건 감싸고 있는 부모 찾기
❑ root
⇨ :root{ }를 body 젤 위에 작성하면 rem은 root를 기준으로 적용됨
❑ em
⇨ section p{ }
⇨ em 단위가 쓰여진 곳의 원래 폰트 사이즈 배수
❑ rem
⇨ 부모 상관없이 기본 16px
ex) 2rem은 몇 px? 32px (16px*2)
    <style>
        :root{
            font-size:12px;
        }
        body{
            font-size:16px;
        }
        .class{
            width:300px;
            background-color: green;
        }
        .class2{
            width:600px;
            background-color: silver;
            height:500px;
        }
        .class3{
            width:50%;
            background-color: green;
            height:50%;
        }
        section p{
            font-size:2em;
            width:10em;
            background-color: green;
        }
        section p strong{
            font-size: 1.2em
        }
        aside p{
            font-size: 2rem;
        }
    </style>
# viewport unit
❑ vw (=viewport width)
⇨ viewport 대비 비율 %와 유사
⇨ margin: 0; (= 여백없이 꽉 채움)
⇨ width: 100vw; (= 가로 100%)
❑ vh (=viewport height)
⇨ height: 100vh; (= 세로 100%)
    <style>
        html{
            height: 100%;
        }
        body{
            margin:0;
        }
        .class{
            width:100%;
            background-color: green;
        }
        .class2{
            width:100vw;
            background-color: green;
        }
        .class3{
            height:100vh;
            background-color: silver;
        }
    </style>
< Selector = 선택자 >
| 1. 태그 선택자 : h1, li, a, p, |
| 2. 전체 선택자 : * 모든요소, div * |
| 3. 클래스 선택자 : .class |
| 4. 아이디 선택자 : #id |
| 5. 후손 선택자 : .area .list 후손. (.area 자식(에 자식)중에 클래스명이 list 인 요소 ) |
| 5-1. .area.list (.area 자신중에 클래스명 list가 있는 .area ) |
| 6. 자식 선택자: .area > p { /* 첫번째 자식들중 p들 */} |
| 7. 인접형제 선택자 : .area + p, .area ~ p |
| 8. 그룹화: p, address {color:lime;} |
| 9. 속성선택자: a[target], a[target="_blank"] |
| 10. 가상선택자: :visited, :hover, :active, :focus .area:hover h1 input:checked |
| 11. 의사 요소 선택자(Pseudo-elements) :before, :after (내용의 앞, 뒤), h1:after {content:'test';} (생성된 내용의 속성은 inline 요소) |
| 12. 구조선택자: :first-child, :last-child, :nth-child(순번), :nth-child(수식) nthmaster.com 짝수마다( li:nth-child(2n) ), 홀수 마다 :nth-child(2n+1) :first-letter, :first-line |
| 12-1. 문자선택자 |
| 13. 형태구조선택자: :first-of-type, :last-of-type, :nth-of-type(순번, 수식) |
| 14. 부정 선택자: :not(선택자) 반대로 선택 :not(p) |
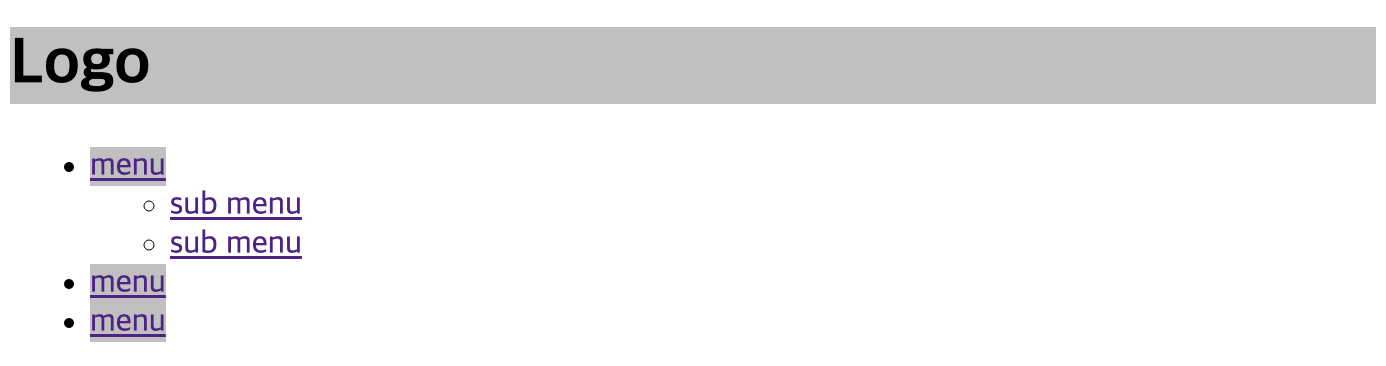
# 자손 선택자
❑ 선택자(제일 크게 감싸고 있는 순위) > 선택자(다음순위)에 적용을 주고 싶을 때
⇨ ex) header .title처럼 중간에 공백을 둠
❑ 자손들을 적용 시킬 때
⇨ ex) nav > ul > li > a{ }
<head>
    <meta charset="UTF-8">
    <meta http-equiv="X-UA-Compatible" content="IE=edge">
    <meta name="viewport" content="width=device-width, initial-scale=1.0">
    <title>Descendent and child Selector</title>
    <style>
        header .title{
            background-color: silver;
        }
        nav > ul > li > a{
            background-color: silver;
        }
    </style>
</head>

<body>
    <header>
        <h1 class="title">Logo</h1>
        <nav>
            <ul>
                <li><a href="">menu</a>
                    <ul>
                        <li><a href="">sub menu</a></li>
                        <li><a href="">sub menu</a></li>
                    </ul>
                </li>
                <li><a href="">menu</a></li>
                <li><a href="">menu</a></li>
            </ul>
        </nav>
    </header>
</body>
# 형제 선택자
❑ 자신의 형제 선택자들만 부르고 싶을 때
⇨ ex) h1 + ul{ }
❑ 자신뒤의 요소들을 전부 부르고 싶을 때
⇨ ex) h2 ~ ul{ }
<head>
<style>
        h1 + ul{
            background-color: silver;
        }
        h2 ~ ul{
            background-color: silver;
        }
    </style>
</head>
<body>
    <h1>Siblings 형제선택자</h1>
    <ul>
        <li>menu1</li>
        <li>menu2</li>
        <li>menu3</li>
    </ul>
    <h2>Main title</h2>
    <ul>
        <li>menu1</li>
        <li>menu2</li>
        <li>menu3</li>
    </ul>
    <h3>Sub title</h3>
    <ul>
        <li>menu1</li>
        <li>menu2</li>
        <li>menu3</li>
    </ul>
</body>
# 속성 선택자
❑ 태그명[target]
⇨ 태그 속성에 적용시키는 선택자
❑ class^=" "
<head>
    <style>
        [target]{
            text-decoration:none;
        }
        [target="_blank"]{
            background-color: silver;
        }
        [class^="inner"]{
            font-weight: bold;
        }s
        </style>
</head>
<body>
    <p>
        <a href="" class="inner_sm">link</a>
        <a href="" target="_blank">naver</a>
        <a href="" target="_blank">daum</a>
        <a href="" target="_self" class="inner_big">google</a>
    </p>
</body>
# 가상 선택자
❑ :hover{ }
⇨ 태그에 마우스를 올렸을 시 적용시키는 선택자
❑ :link{ }
⇨ 링크 태그에 적용 시킬 때
❑ :visited{ }
⇨ 방문 후에 표시되는 것
❑ a, input, button{ }
⇨ 가상 선택자를 동시에 부를 때
❑ a:focus{ }
⇨ a 태그에 집중(tab) 시킬 때
❑ input:focus{ }
⇨ 선택 된 input type 박스를 눌렀을 시 적용되는 태그
❑ form p:focus-within{ }
⇨ form의 p태그 within(가로줄) 선택
⇨ 자신, 자식, 형제가 순위가 더 높은 부모를 선택하는 법
<head>
    <style>
        h1:hover{
            background-color:silver;
        }
        :link{
        font-size:20px;
        text-decoration:none;
        font-weight:bold;
        }
        :visited{
            color:#ebebeb;
        }
        a, input, button{
            outline:none;
        }
        a:focus{
            background-color: blue;
            color: #fff;
        }
        input:focus{
            border-color:blue;
        }
        form p:focus-within{
            background-color: silver;
        }
    </style>
</head>

<body>
    <h1>Pseudo-class Selector</h1>
    <p>
        <a href="http://www.naver.com">link</a>
        <a href="http://www.apple.com">link</a>
    </p>
    <form action="">
        <p>
            <label for="username">이름</label>
            <input type="text" id="username">
        </p>
        <p>
            <label for="usermail">이메일</label>
            <input type="email" id="usermail">
        </p>
        <button>회원가입</button>
    </form>
</body>
# 의사 요소 선택자 / 특수문자 / 공백
❑ :after / :before
⇨ 내용의 앞과 뒤를 선택하고 싶을 때
❑ {content: '특수문자';}
⇨ 소스코드는 앞에 \ 넣기
❑ 공백은 {content: ' ';} 로 표현
⇨ 공백은 한 번만 표현 가능함
<head>
<style>
h1:before{
content:'-';
}
h1:after{
content:'-';
}
h2:before{
content:'\2605'
}
h3:before{
content:'';
width:10px;
height:10px;
background-color: red;
display: inline-block;
margin-right:10px;
}
</style>
</head>
<body>
<h1>Pseudo-element Selector</h1>
<h1>Pseudo-element Selector</h1>
<h1>Pseudo-element Selector</h1>
<h2>content★</h2>
<h3>title</h3>
</body>
# 구조 선택자
❑ :nth-child(순번,수식)
⇨ 선택자의 형제 중 순번, 수식으로 부를 때
❑ :first-child / :last-child
⇨ 태그 중 첫째와 막내를 부를 때
❑ 짝수 태그들을 부를 때
⇨ :nth-child(2n) / :nth-child(even)
❑ 홀수 태그들을 부를 때
⇨ :nth-child(2n+1) / :nth-child(odd)
❑ :nth-child(n+순번):nth-child(-n+순번)
⇨ ex) 2~5번 태그들만 부르고 싶을 때 사용 가능
<style>
        li:nth-child(1){
            text-decoration:underline;
        }
        li:nth-child(3){
            text-decoration:underline;
        }
        div:nth-child(2){
            background-color: silver;
        }
        li:nth-child(1),
        li:nth-child(5){
            background-color: silver;
        }
        li:last-child{
            text-decoration:underline;
        }
        /*
        p a:nth-child(2n){
            background-color: silver;
        }
        p a:nth-child(2n+1){
            text-decoration: none;
        }
        */
        p a:nth-child(even){
            text-decoration: silver;
        }
        p a:nth-child(odd){
            text-decoration: none;
        }
        section p:nth-child(n+2):nth-child(-n+5){
            background-color:silver;
        }
</style>
# 형태 구조 선택자
❑ :nth-of-type(순번,수식)
⇨ 같은 선택자의 형제를 순번, 수식으로 부를 때
❑ :first-of-type
⇨ 같은 선택자의 형제 중 첫째
❑ :last-of-type
⇨ 같은 선택자의 형제 중 막내
<style>
        h2:nth-of-type(2){
            background-color: silver;
        }
        h2:first-of-type{
            color: blue;
        }
        h2:last-of-type{
            color: blue;
        }
</style>
# Checked 선택자

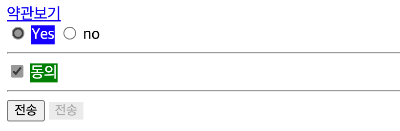
<style>
        input:checked + label {
            background-color: blue;
            color: #fff;
        }
        input[type="checkbox"]:checked + label{
            background-color: green;
            color: #fff;
        }
        button:disabled{
            background-color: #ebebeb;
            border:none;
        }
        #policy{
            display: none;
        }
        #policy:target{
            display: block;
        }
</style>
</head>
<body>
    <a href="#policy">약관보기</a>
    <form action="">
        <input type="radio" name="newsletter" id="yes">
        <label for="yes">Yes</label>
        <input type="radio" name="newsletter" id="no">
        <label for="no">no</label>
        <hr>
        <input type="checkbox" id="agree">
        <label for="agree">동의</label>
        <hr>
        <button>전송</button>
        <button disabled>전송</button>
    </form>
    <div id="policy">
        <h2>약관안내</h2>
    </div>
</body>
# 부정 선택자
❑ :not(선택자)
⇨ 다른 스타일로 부정하고 싶을 때
❑ :not(p)
⇨ 반대로 선택 할 때
<style>
        header *:not(h1){
            color:green;
        }
        ul li:not(:first-child){
            color:green;
        }
</style>
'CSS' 카테고리의 다른 글
| shadow / gradient / transition / animation (0) | 2023.06.01 |
|---|---|
| position / z-index (0) | 2023.06.01 |
| float (0) | 2023.06.01 |
| display / overflow / background (0) | 2023.06.01 |
| 우선 순위 / font & text / vertical-align / list Style (0) | 2023.06.01 |